This post will summarize how to prepare your submission for the AP Create Task.
First, a few notes about attributions in the code you have co-developed with your peers.
Acceptable AI Use
From the College Board:
Students are permitted to utilize generative AI tools as supplementary resources for understanding coding principles, assisting in code development, and debugging. This responsible use aligns with current guidelines for peer collaboration on developing code.
Students should be aware that generative AI tools can produce incomplete code, code that creates or introduces biases, code with errors, inefficiencies in how the code executes, or code complexities that make it difficult to understand and therefore explain the code. It is the student’s responsibility to review and understand any code co-written with AI tools, ensuring its functionality. Additionally, students must be prepared to explain their code in detail, as required on the end-of-course AP Exam.
Plagiarism
From the College Board:
The use of program code, media (e.g., video, images, sound), data, information, or evidence created by someone else or with generative AI tools in the creation of a program and/or a program code segment(s), without appropriate acknowledgment (i.e., through citation, through attribution, and/or by reference), is considered plagiarism.
A student who commits plagiarism will receive a score of 0 on the Create performance task, including their responses to the written response prompts on the end-of-course AP Exam.
Attribution
From the College Board:
Some examples of ways to provide attribution for program code that was not authored by you are as follows:
- If the program code has been made available for your use by your teacher, add a comment that states: This code was provided as starter code by my teacher.
- If the program code has been made available through an API or open- source code, add a comment that states: This code was made freely available by [source of code].
- If the program code has been co-created with the assistance of a generative AI tool, add a comment that states: This code was generated using [Generative AI Tool Name].
Add comments to your program code to clarify the functionality of program code segments or to acknowledge and credit authors of media, data sources, or program code.
Add comments now
As needed, take time now to add comments within your code base identifying where you co-developed with AI, and to identify which member of your group was the primary author for a given file.
Here is one example of how to do this – as needed, modify the header that should already exist at the top of each given source code file in your project:
//
//  AddPlannedFeedingView.swift
//  BoneAppetit
//
//  Created by Russell Gordon on 2026-04-10.
//  This code was co-developed with Anthropic Claude.
//
Prepare your submission
IMPORTANT
Complete this step only when your work on your group’s app is complete.
Program Code
From the College Board:
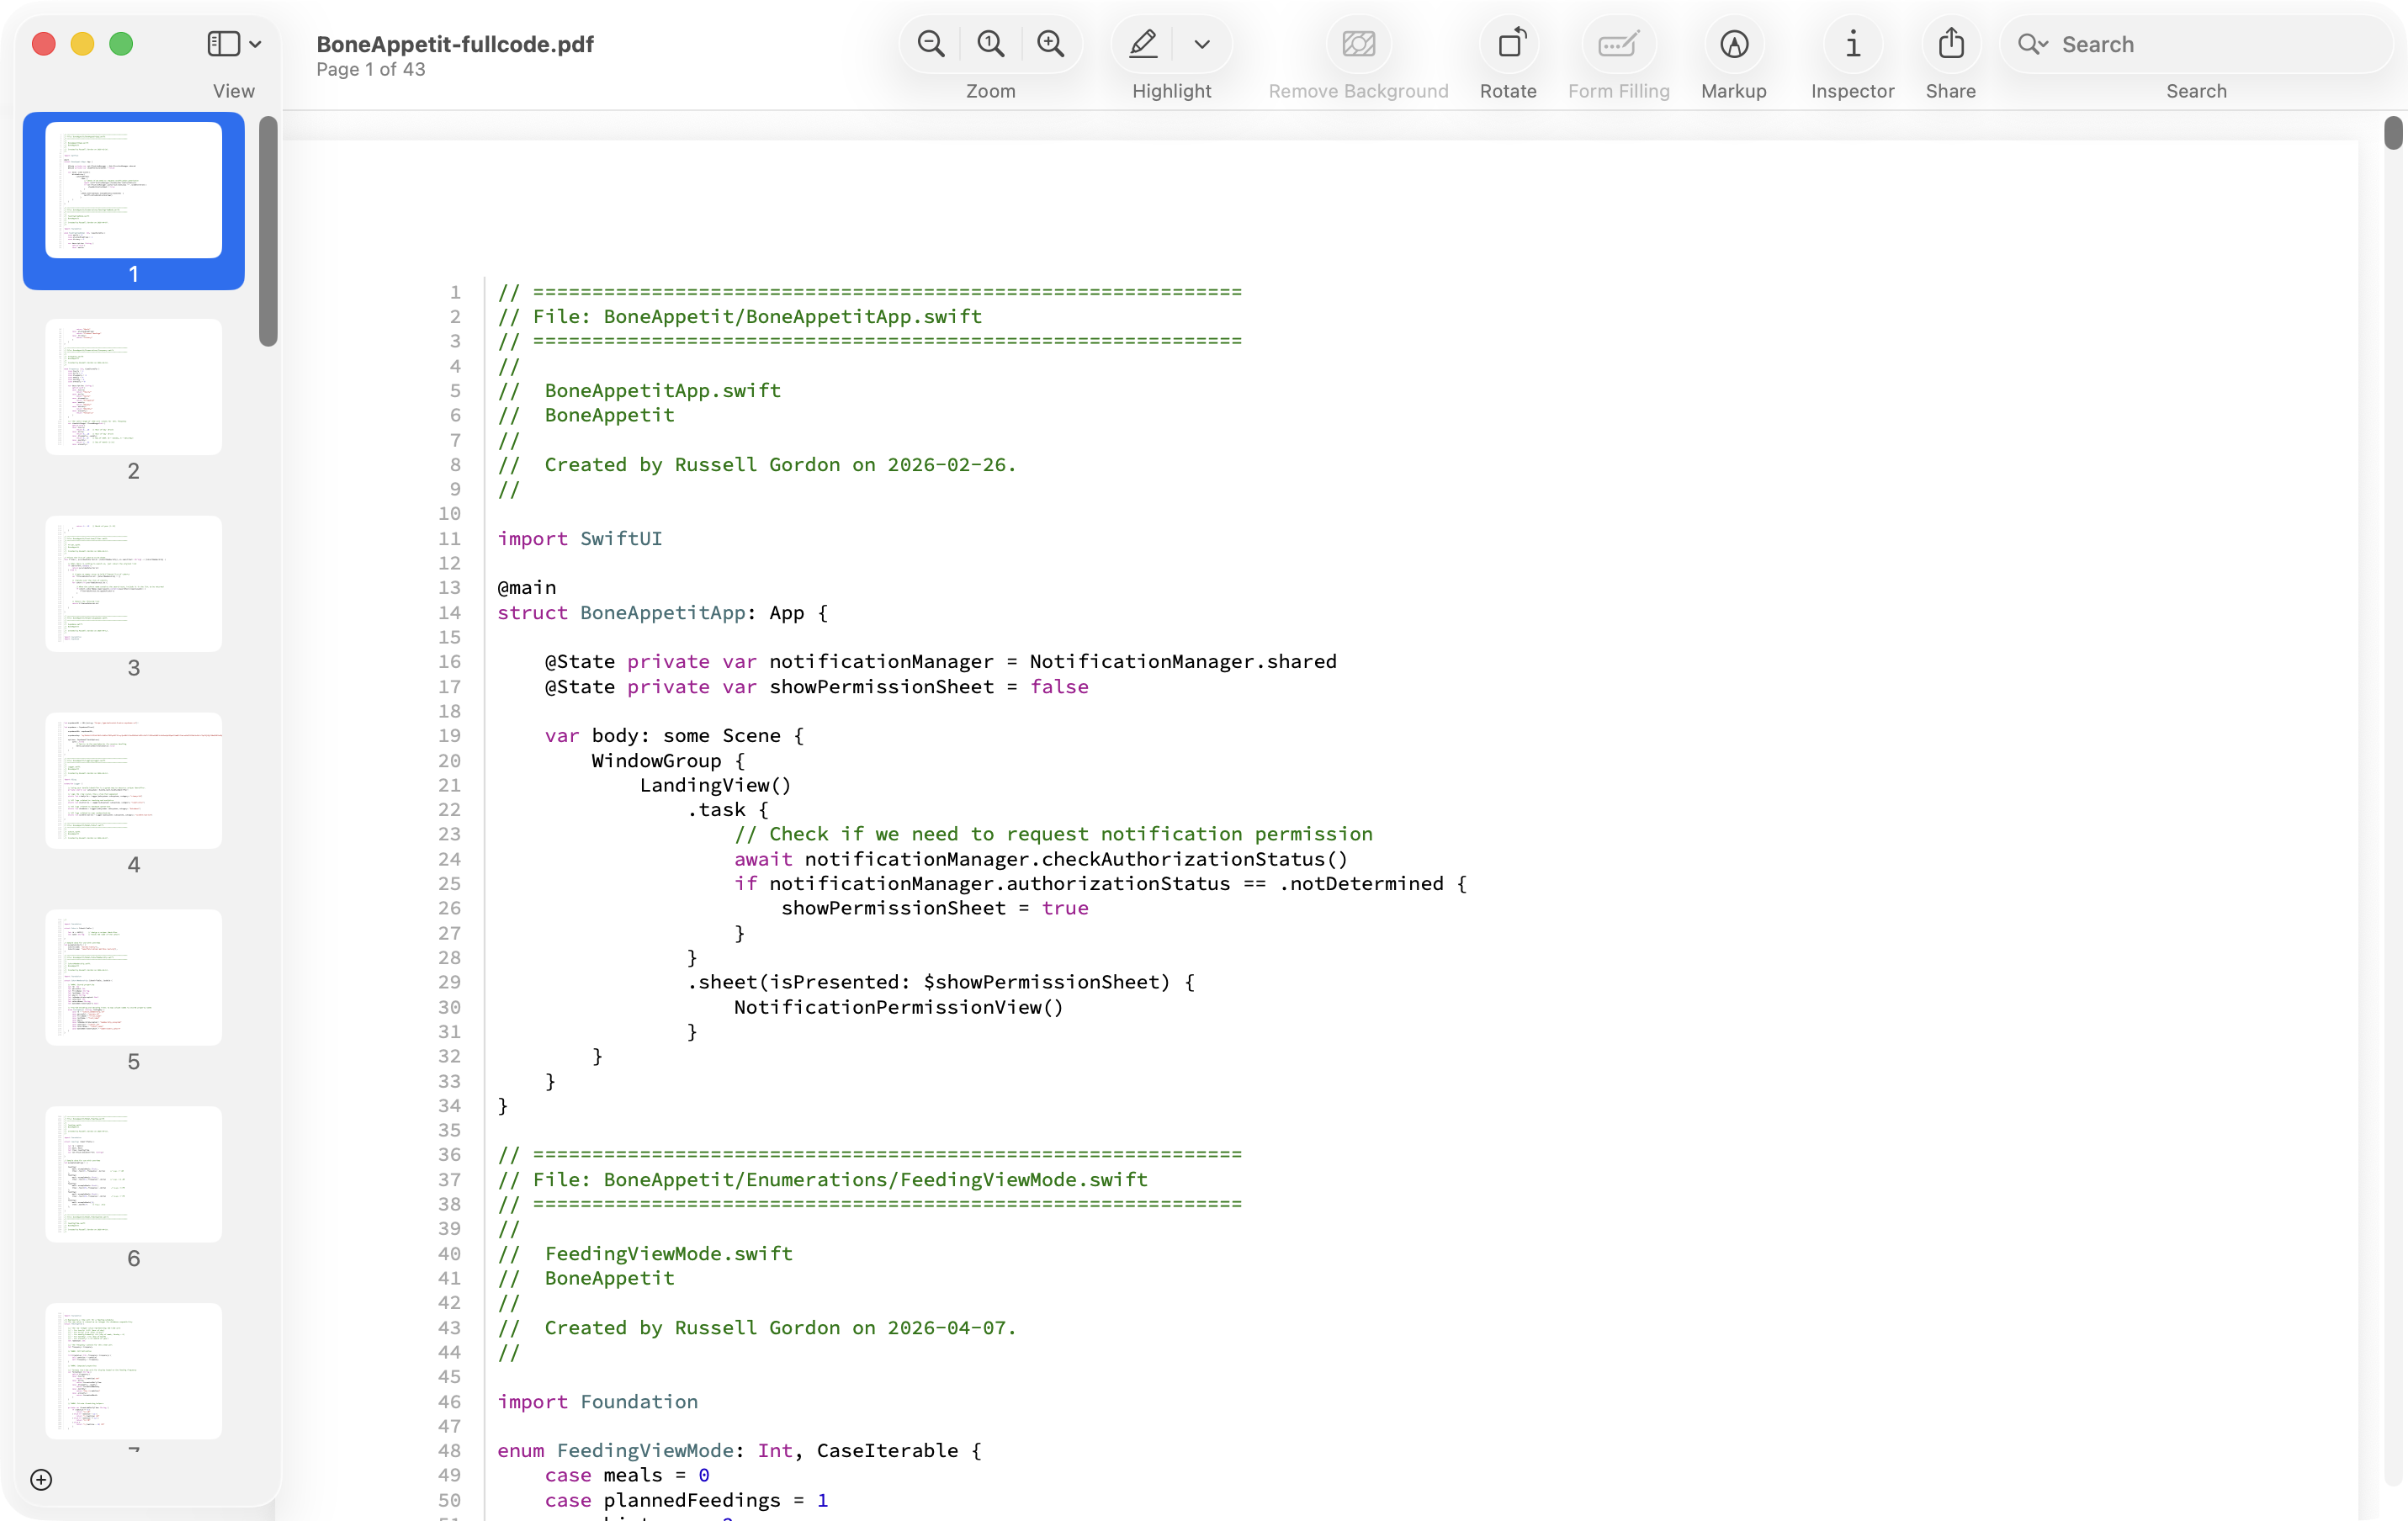
Submit one PDF file that contains all of your program code (including comments). Include comments or acknowledgments for any part of the submitted program code that has been written by someone other than you and/or your collaborative partner(s) [for example, AI tools].
To do this, first find the folder that your project is contained within, then open a Terminal window at that folder:
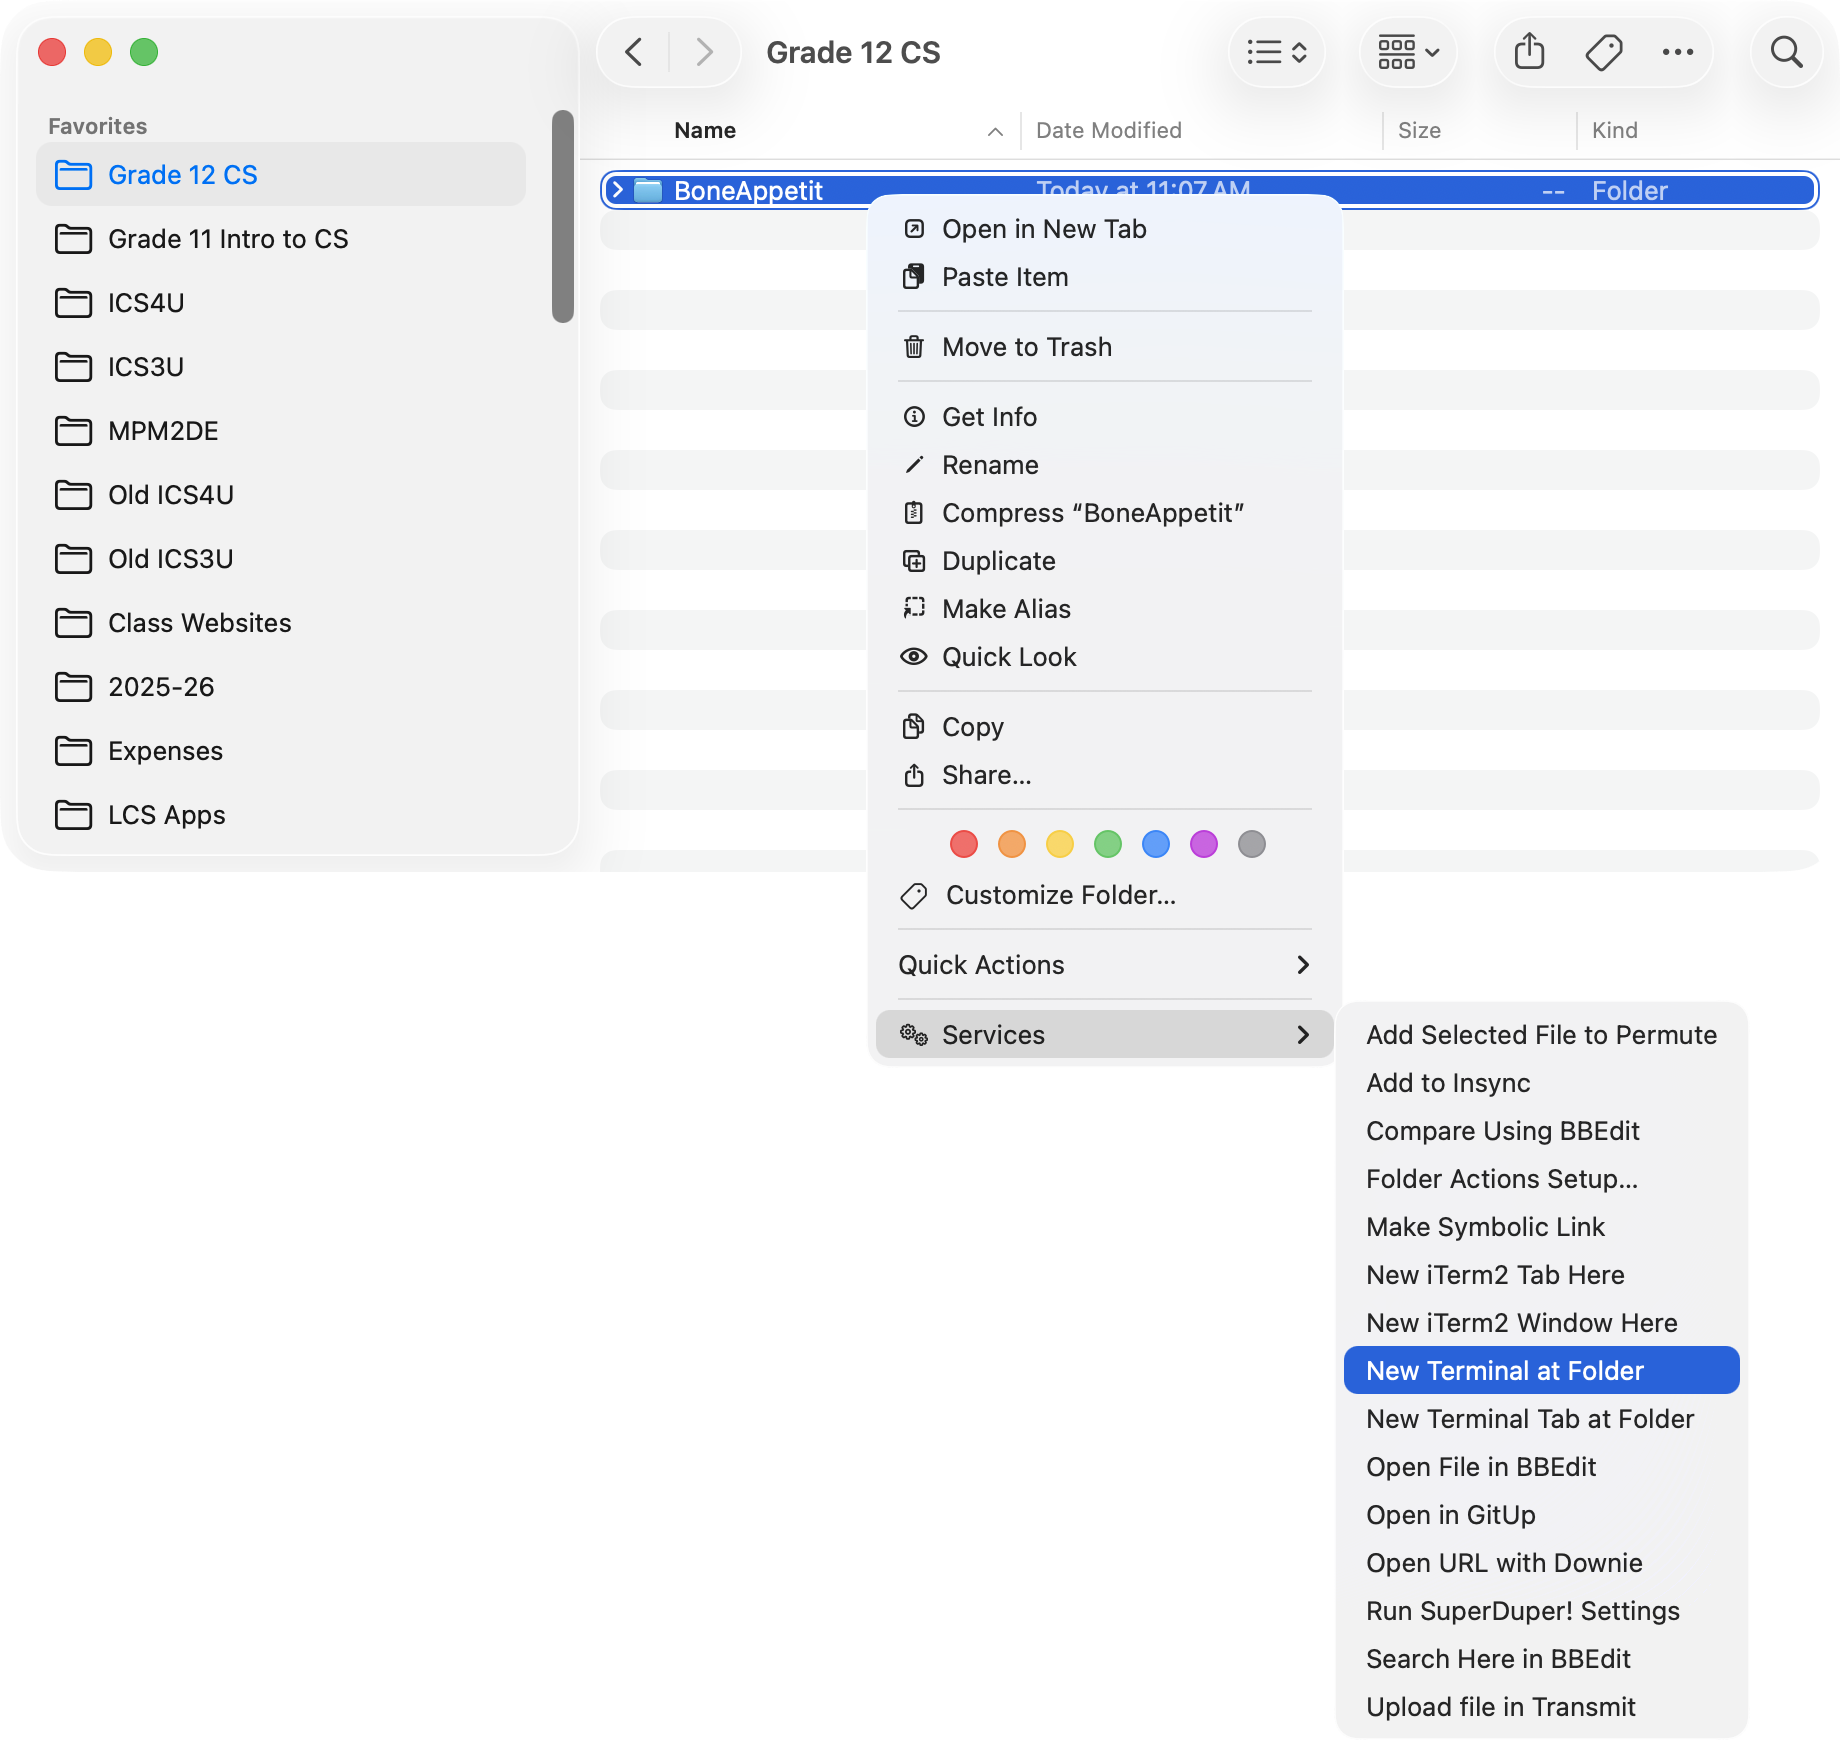
You should then be at a window that looks like this, except in your own project folder:
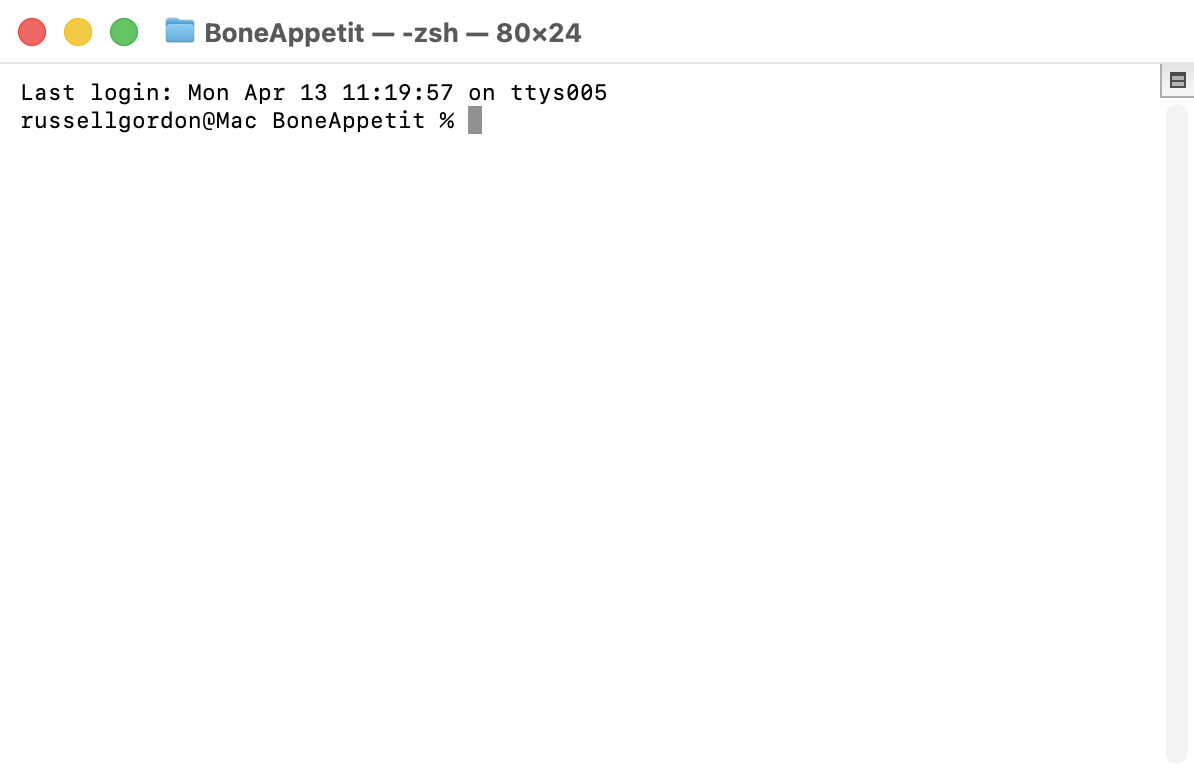
Type ls and verify that you can see the .xcodeproj file:

NOTE
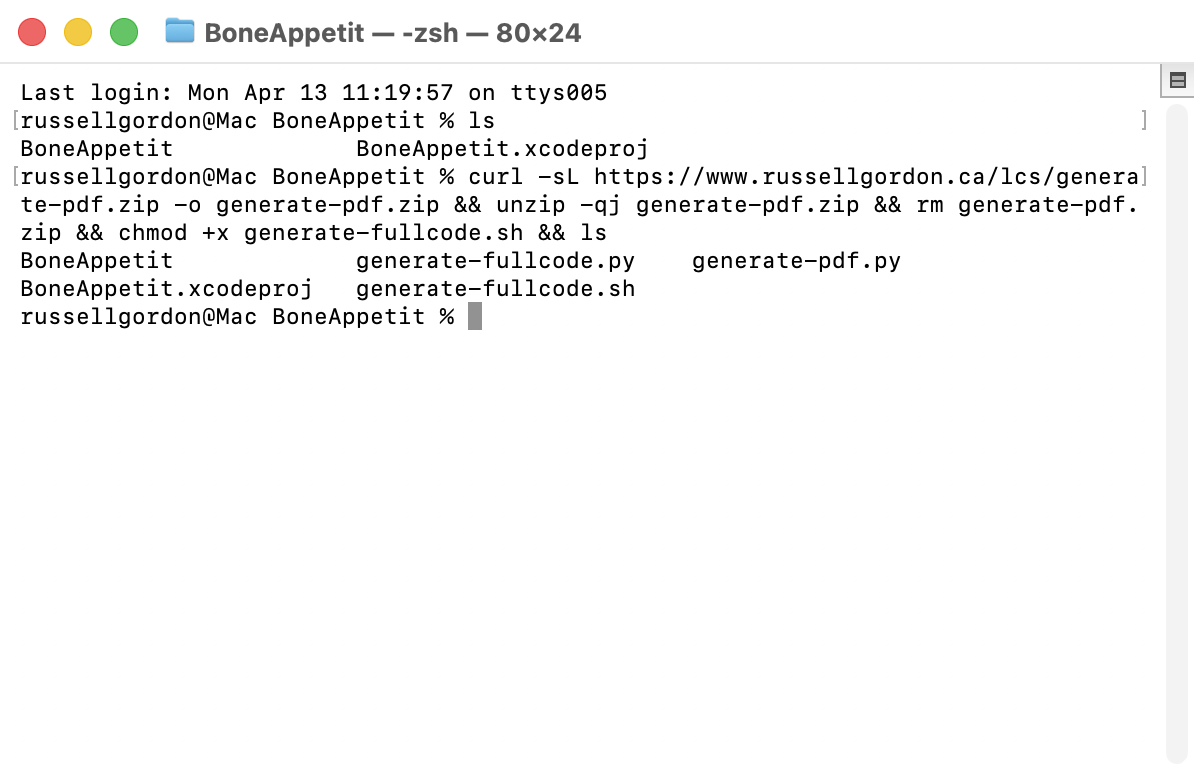
Based on testing by Mr. Gordon, you will likely need to run the next command twice. The command is given immediately after this note.
The first time you run the command, you will see the system automatically install quite a few small software packages via Homebrew that are required to generate the PDF files of your program code. The command will show a small error message after all of the software packages are installed.
If you then press the ↑ arrow on your keyboard to recall the command and press Return on your keyboard to run it a second time, it should generate the PDF files successfully.
Finally, when you copy the command, remember to use the copy button at right:
You will know you copied the complete command successfully when you see the green arrow:


Now copy this command and paste it in that Terminal window, remembering to press the Return key to run the command:
curl -sL https://www.russellgordon.ca/lcs/generate-pdf.zip -o generate-pdf.zip && unzip -qj generate-pdf.zip && rm generate-pdf.zip && chmod +x generate-fullcode.sh && lsTIP
What that command does, step by step:
Part Purpose curl -sL … -o generate-pdf.zipDownload silently ( -s), following redirects (-L), saving to a local zipunzip -qj generate-pdf.zipExtract quietly into the current folder rm generate-pdf.zipClean up the zip file chmod +x generate-fullcode.shMake the shell script executable lsList the contents of the current folder
When you run the command above, the output should look like this:
Now copy and paste this command, then run it in the same Terminal window:
./generate-fullcode.shThe output will look like this:

Now type open . and press Return in the Terminal window to get a Finder window in the same folder:
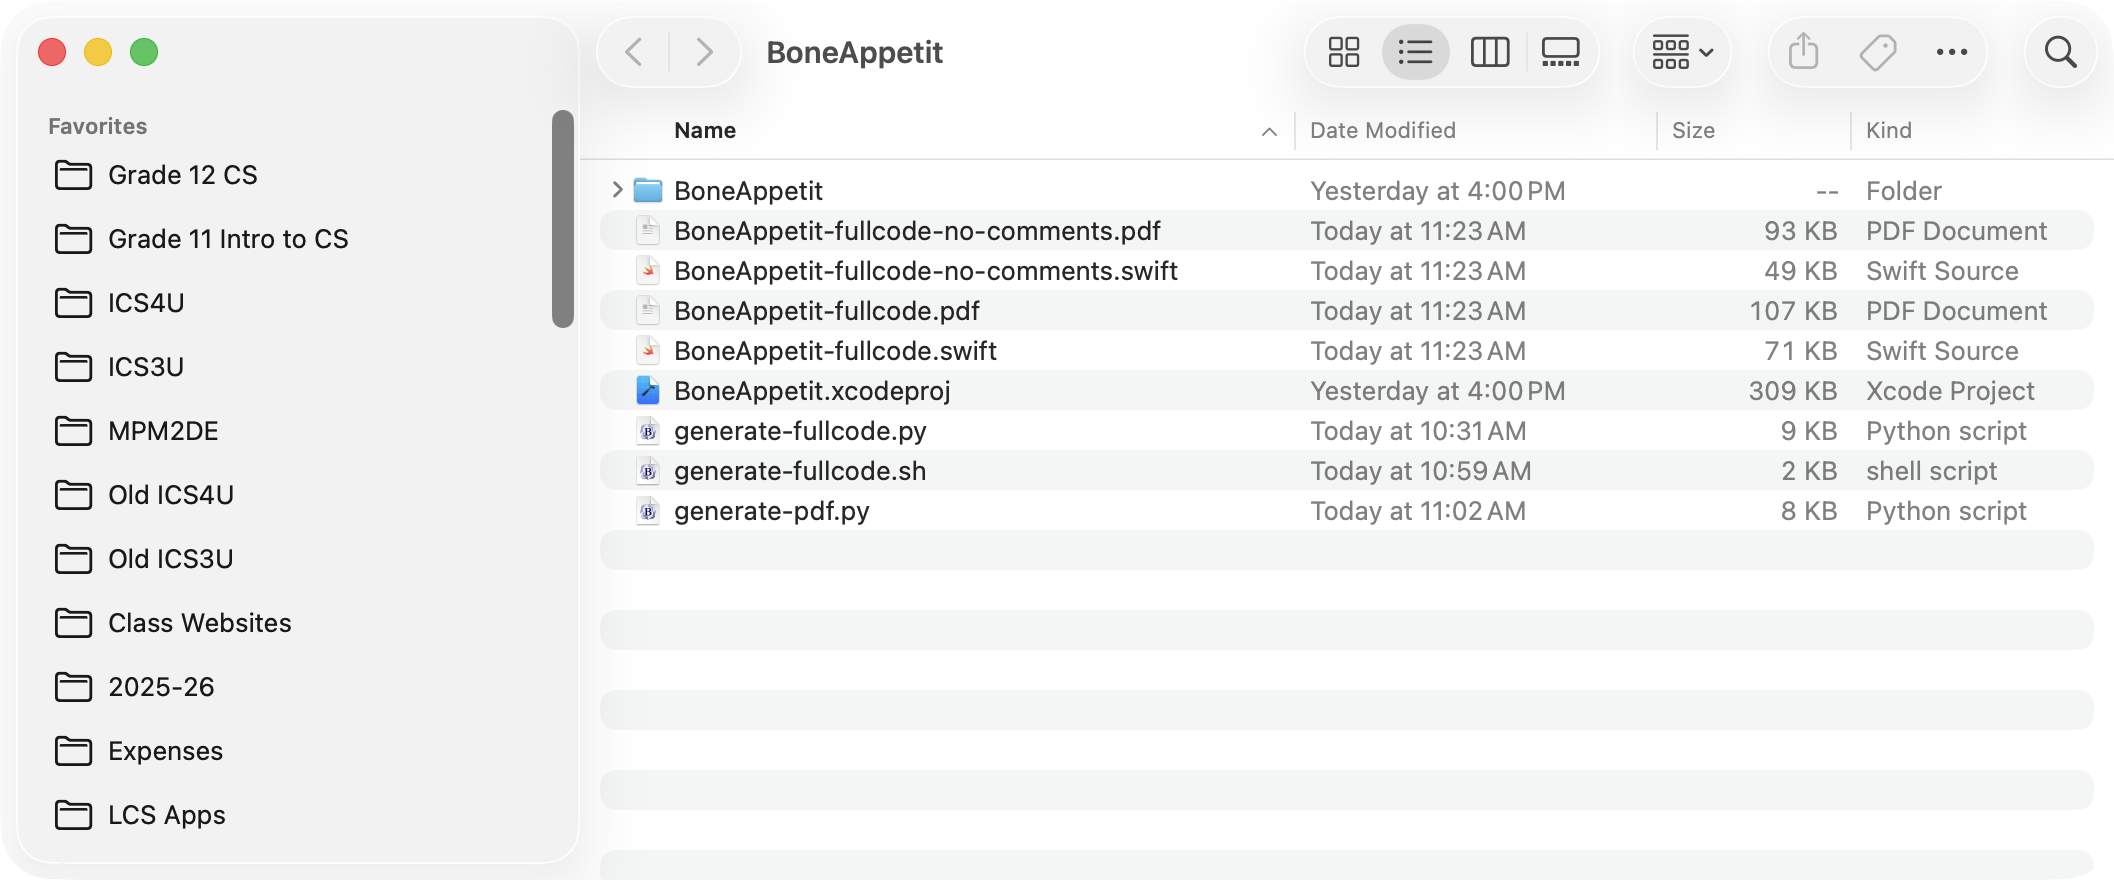
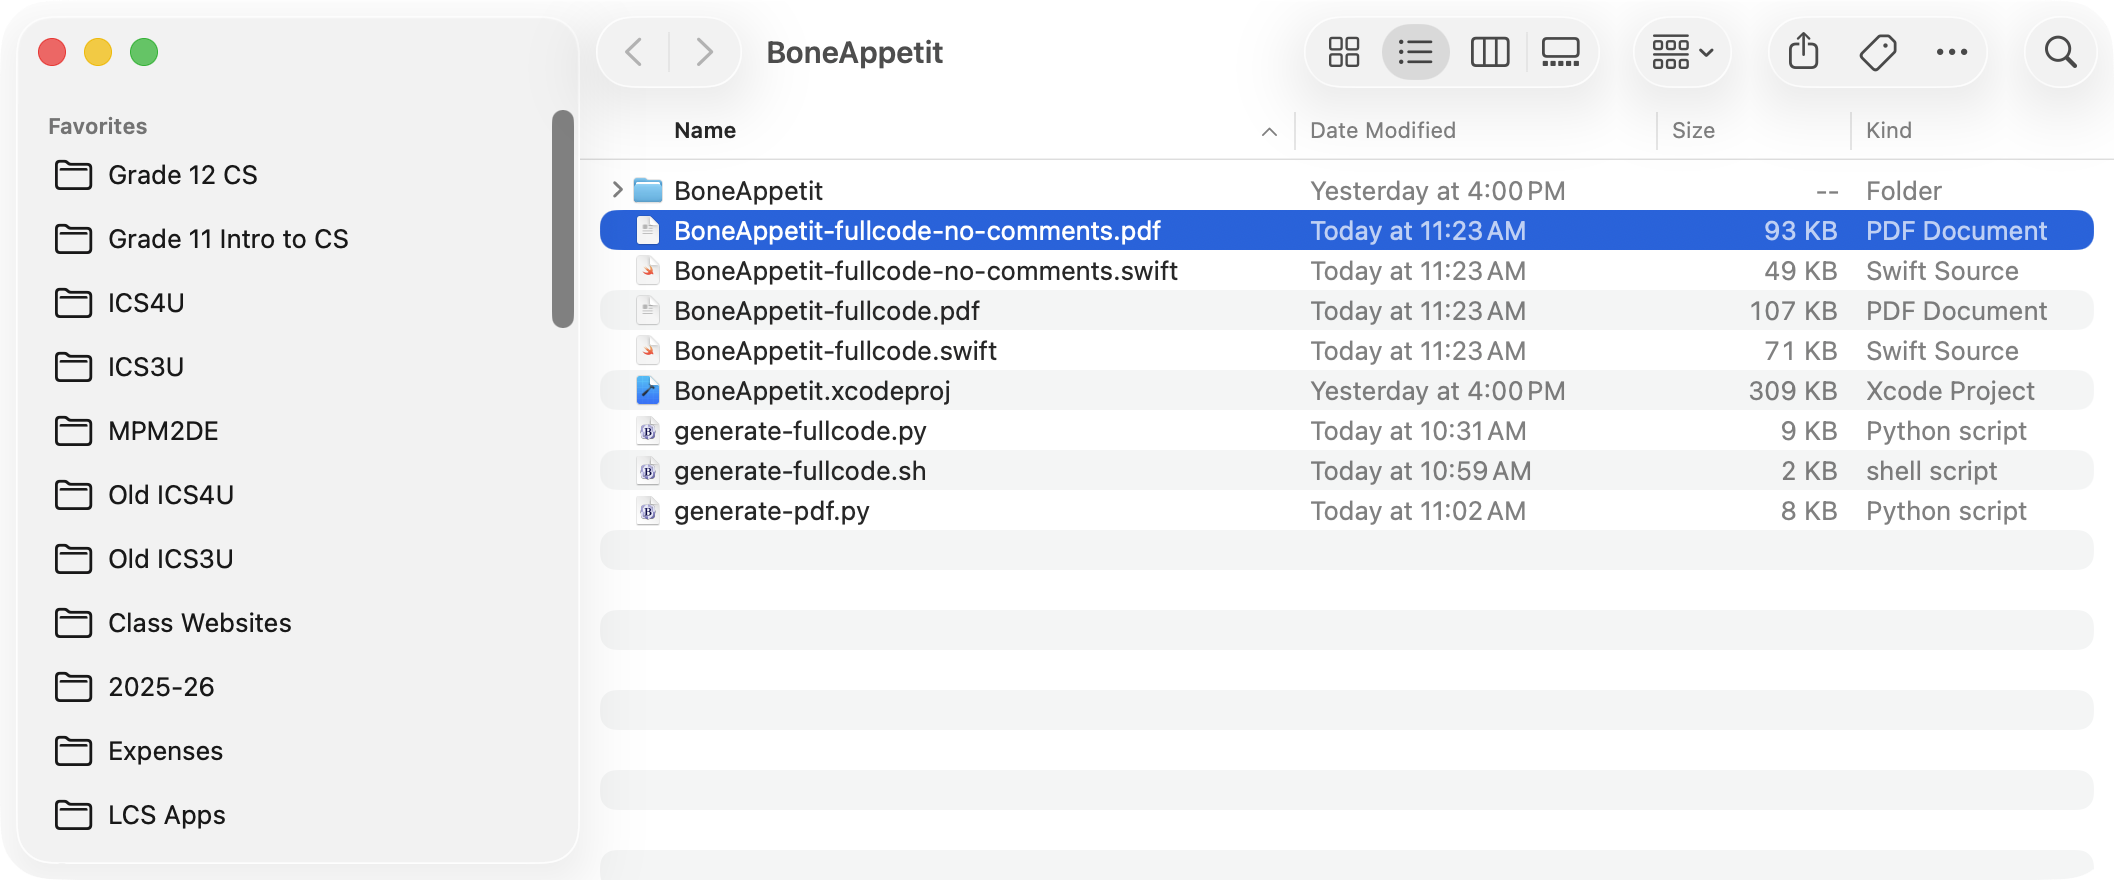
The following file – look for the -fullcode.pdf suffix – is the file you will submit to the College Board for the Program Code requirement:

Double-click to open the file and review it – make sure that all the program code from your project is present and that you see comments:
Now, log in to the College Board Digital Portfolio site and submit the program code PDF you opened above.
Video
From the College Board:
Submit one video file that demonstrates the running of your program as described below.
Collaboration is not allowed during the development of your video.
Your video must demonstrate your program running, including:
- Input to your program
- At least one aspect of the functionality of your program
- Output produced by your program
Your video may NOT contain:
- Any distinguishing information about yourself
- Voice narration (though text captions are acceptable)
Your video must be:
- Either .webm, .mp4, .wmv, .avi, or .mov format
- No more than 1 minute in length
- No more than 30MB in file size
If you can use the Simulator to run your app, that will be the easiest way to obtain a screen recording. Press Command-R to start recording while your app runs in the Simulator.
Alternatively, run your app on your phone, and make a screen recording there. Be careful not to accidentally include any information to identify yourself (such as notifications while you are recording your app running, or your phone’s home screen).
Now, log in to the College Board Digital Portfolio site and submit the resulting video.
Personalized Project Reference
IMPORTANT
Screenshots for your Personalized Project Reference must not contain any comments whatsoever.
You will use the second PDF generated earlier to take screenshots:
Use the Command-Shift-4 keyboard shortcut to capture clear screenshots of the relevant portions of your program code from this file.
Now, log in to the College Board Digital Portfolio site and submit the required screenshots – details for required screenshots are included below.
Procedure
The first two screenshots (program code segments) are related to the procedure (also known as a function) that you wrote within your app.
From the College Board, this is what you need to upload screenshots of:
The first program code segment must be a student-developed procedure that:
- Defines the procedure’s name and return type (if necessary)
- Contains and uses one or more parameters that have an effect on the functionality of the procedure
- Implements an algorithm that includes sequencing, selection, and iteration
The second program code segment must show where your student-developed procedure is being called in your program.
List (Array)
From the College Board:
Capture and paste two program code segments you developed during the administration of this task that contain a list (or other collection type) being used to manage complexity in your program.
The first program code segment must show how data have been stored in the list (e.g.: where the list is populated).
The second program code segment must show the data in the same list being used, such as creating new data from the existing data or accessing multiple elements in the list, as part of fulfilling the program’s purpose.